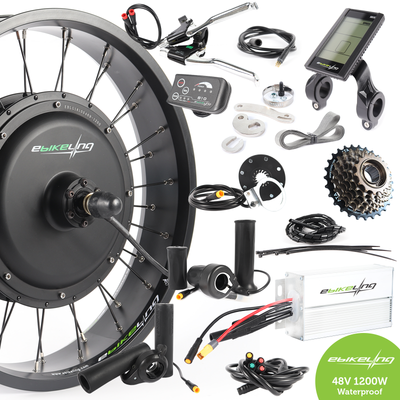
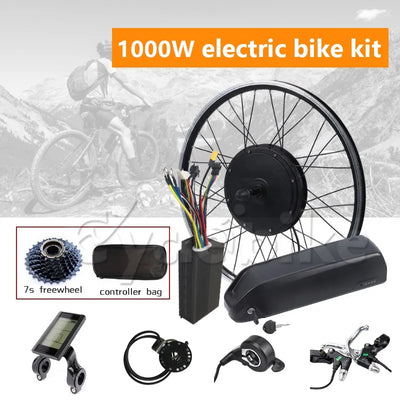
BBS02 Installation
Posted by Tom Lee on
The stock BBS02 can be installed by almost anyone with a little bike mechanic know how in an hour or three. Before you start you need to consider a few things.
1) Is my battery really capable of driving my unit? If you bought your battery and BBS02 from a reputable vendor then chances are they have set the Amperage draw on the BBS02 controller to match what the BMS on the battery can provide. If the draw is too high then the BMS will be stressed and can shut down. If the draw is too low then you are missing out on power that you could have access to, and power is what it is all about. You should ASK your battery provider what the BMS is rated for in Continuous Amps. Most Chinese battery manufacturers overstate their capabilities and the BBS02 750W when programmed at the maximum can draw a 25 Amps. Your safest bet is to buy a battery pack that can support 30Amps continuous, although it will work with one that can only draw 25 Amps continuous. Em3ev has several custom-made battery packs here which are quite good of which I believe the Samsung 25R packs are the best.
2) Is this unit going to fit properly on my bike? Measure your bottom bracket. If it is >68mm (many are) then you may need some additional washers to make it fit right. Worse case scenario you may have to grind down the Bottom Bracket with an angle grinder to get the BBS02 to fit. If you have a fatbike with 100mm bracket there is a good chance you won’t be able to grind down the BB enough to make it fit and will have to look at the article about BBS02 on Fatbikes for some other options.
3) Do I want to disable the pedalec? The BBS02 Pedal Assist System (PAS) is often criticized by people because it works quite differently than most PASystems. With most PAS without torque sensing the more you pedal the faster you go. The BBS02 works the other way. The MORE you pedal the less the BBS02 applies power. Once you learn to adjust to this, it becomes quite natural. However for many people it can be hard to adjust to. If you are singletrack trailriding you almost certainly will want to disable the PAS system as nothing is worse than winding through the trees and having the bike accelerate you out of control into a tree.

You can see the PAS disabled by removing the grey wire from the pin block in the center and on the bottom left the temp probe laid down against the potting material ready to be siliconed in.
To disable the PAS take the controller off by pulling off the left crankarm and the chainwheel and then removing the plastic cover. Remove the 3 hex blots and wiggle the controller off carefully. Find the black connector and peel some of the silicone off of it. Find the thumb release tab, press it and pull the connector apart. Use a tiny screwdriver or screw to push the tab down on the female contact and carefully pull the wire out of the connector. Cover the end of the pin with electrical tape and reassemble the unit. Be careful screwing on the black plastic cover as it is very easy to crack the case from over tightening.
For the woods, it’s often throttle only and you should make sure that your throttle is tight and doesn’t work its way over and get stuck against the handbrake. I always install the throttle on the left as I want my right hand covering the brake at all times. You can mount the stock throttle on the left even though it is a right hand throttle by mounting it upside down.
4) If I want to keep the pedalec how will I mount ebrakes? There is another post titled ebrakes which will help you figure out how to do this. There are a lot of options.
5) What connectors will I use to connect my battery with? Most commonly used connectors are the anderson and the banana connectors. I prefer the anderson for many reasons, if you are going to be plugging and unplugging the battery then it really is your only option. Do an ebay search for Anderson Powerpole will show you many vendors who sell the 45 Amp connectors for around $.35 each. These connectors slide together like lego and work quite well. Although they are not waterproof I use a small amount of silicone around the end of the connector with the wire in it then slide some heat shrink tubing and shrink it down with the silicone still wet. Make sure to use silicone that has no acetic acid like GE’s Silicone II brand. You can get a set of crimpers for around $30 as well and it is a worthwhile investment for your ebike toolkit. Why powerpole? When you connect the battery it will spark. This continued sparking will destroy most connectors except the anderson. The powerpole has a sacrificial ‘tongue’ that connects first and takes the brunt of the spark. If the connectors stop working as well try to put a small amount of dielectric silicone inside the end of them to make a better connection.
6) Make sure you have a crankarm puller, these can be had very cheaply on ebay for about $3.50 from Honk Kong, but it will take at least a week to get to you. Some crankarms do not need a puller, most do. It might make sense to invest in a small toolkit that includes may of the special tools for working on bikes. An ebay search for “Bicycle toolkit” will reveal many kits in the <$50 range that will probably have every tool you will ever need for bicycle repair.
Installing the BBS02
Once you have everything together that you need from the above steps it’s time to take the bike apart and mount the BBS02. The english manual for the BBS01 (very similar to the BBS02) is located here. Spare parts for the BBS02 can be purchased from Doug at California E-bike here.
1) Remove the crank arm – There are many different kinds of Bottom Brackets and crank arms. Most are removed in more or less the same way. Usually there is a bolt that is removed and then you need to use a crankarm puller to get the arm off. The crankarm puller threads into the crankarm then you turn the smaller bolt head to ‘push’ the crankarm off. Some newer BB/Crank arm combos have a bolt in the crankarm that is trapped by another nut such that if you loosen the inside bolt first it will push against the outside nut pulling the crankarm off without any special tools. Don’t try knocking the crankarm with force, you will damage something. You must use a puller, they are only about $3.50 on Ebay. Great written instructions on removing cotterless crankarms can be found here. If your bike is very old (pre 1980) you may have a cottered crank which case the removal is far more complicated and is outlined here .
2) Next you must replace the BB. If it has the bearings on the outside (outboard bearing assemblies) then you will need to remove the bearings as shown here . If you don’t have the special wrench for removing the bearings you can remove them using long locking pipe plyers, but be extremely careful when doing this not to damage the bearing casing. Often wrapping the cup with a rag before using the plyers is helpful to avoid marking them up. If you have cartridge bearing bracket then you will need to use a special tool to remove them as shown here. The Bottom Bracket bearing cup on the cheaper <$500 bikes can be exceedingly difficult to remove without putting the tool in a vise and using the entire bike as a lever. Remember that the Drive side is reverse threaded (clockwise to loosen).

Crank arm puller
3) Clean the Bottom Bracket casing out of oil and dirt and carefully insert the BBS02 unit in place. The large wheel should be on the chain side. Figure out what kind of clearance you have once the mounting plate is secured on the other side. If you have a 73mm BB (quite common on Mtn bikes) then you will need to use a few small washers to use as spacers. The plate must rest flush against the Bottom Bracket with the ‘teeth’ facing toward the BB and washers that you use as standoffs for the M6 bolts (unless it fits flush with no washers). Put blue locktite on the bolts and thread them down with decent torque. The lockring must go on next (also with blue locktite) and be tightened down ‘as hard as you can’ with a lockring wrench.
4) If your BB is 73mm then there is a good chance that you will not be able to put on the final lockring. As long as you use locktite on the first lockring and tighten it down good and tight then the motor should stay in place. You must tighten down the lockring very tight though as there is a lot of forces that will try to loosen it.
5) Install the chainring using the instructions in the BBS02 Chainring section if you want to install a custom sized chainring (34 or 36T recommended for singletack trailriding).
6) Install crankarms and pedals. Remember the drive side pedal is reverse threaded so you tighten it backwards.
7) Install the ebrakes as shown in this section or disable the PAS system by removing the grey wire from inside the controller.
8) Crimp Anderson Powerpole connectors onto the power cables and run 12 Gage multistrand speakerwire to your battery. Anderson powerpole connectors can be had for <$.50 each on ebay. I ususuallyuy from Connecter Pros. You can also get a crimper for ~$30 which you will need to make the connections right. I usually keep the power and ground seperate, install them on different color wires (Red and black) and then I put a little silicone on the crimp, cover it with heat shrink tubing and shrink it down when the silicone is still wet. That makes a nice water-resistant connection. You can use the Velco ONE zipties which are far more attractive and reusable than zip ties. They don’t scratch the frame of your bike, they look attractive and you can move them easily if you need to. I also use the Velcro ONE ties to connect the cable to a battery in my backpack so when I take a header and crash the velcro will easily detach the power cable with no damage to the connectors or the cable.

Silicone inside the heat shrink tubing helps with water resistance and two Velcro ONE ties can be stuck together to keep your wires together
You can mount the battery on the bike or throw it in a backpack. I wrap my battery in a thermarest pad, cut some holes in it for cooling and use a backpack. My reasoning is any weight you can keep off the bike proper will help to preserve the integrity of the biking experience.
9) Install throttle and display. Since I usually pull off the left side shifter I install the throttle on the left hand side (even though it is meant to be installed on the right. I find that one thumb on the throttle and a finger or two on the back brake is the safest riding configuration for me.

My backpack battery protection system
10) Install the speed sensor and magnet. I recommend putting this on the non-drive side and on the chainstay. The adhesive is useless, you will need to use zipties. The magnet will not stay where it should on the spoke unless you wrap the spoke with a tiny piece of duct tape or electrical tape. Without the speed sensor the bike will still work in non-PAS mode but you will get an annoying Error 21 message continually.
11) Go out and ride!
Ride On
Our friend Ron (spinningmagnets) wrote a great article about the BBS02 on Electricbike.com with a lot of nice pictures that weren’t taken with a 6 year old android cellphone with a broken lens.