This item is currently unavailable

|
Model Number
|
tsdz2 centro motore
|
Voltage
|
DC 24V/36V/48V
|
|
Set Speed
|
25km/h
|
Weight for motor
|
3.60kgs
|
|
Max speed
|
40km/h
|
Certification
|
CE, RoHS
|
|
Power
|
250W
|
Warranty
|
2 years
|
|
Teeth Plate
|
42T
|
Crank length
|
170mm
|
|
Wheel size
|
Adjustable
|
MOQ
|
1 Piece
|
|
Origin
|
suzhou, jiangsu
|
Function
|
conversion kit
|
|
Max torque
|
80 -90 N.M.
|
Port
|
Shanghai
|
tsdz2 centro motore contains :
a) Motor intergrated with controller and torque sensor;
b) LCD display, several different models are available for selection;
c) Detective sensor;
d) Crank;
e) Teeth plate;
f) Operator;
g) Tool for installing Accessories for installing.
h) Brake level and throttle are optional;


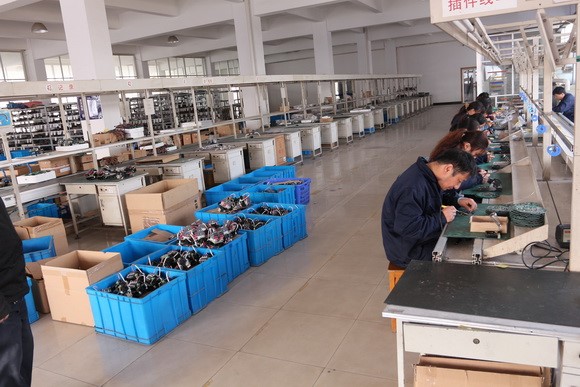

Why choose the little motor- TSDZ2 Mid drive motor?
- Supports up to 58.6V (48V mid motor) input voltage.
- Fits 95% of standard bike frames with 68-73mm bottom bracket built in torque and cadence sensor- this results in much smoother acceleration than any cadence sensored mid motor.
- Easy to install. Kit includes all installation parts and tools.
- The motor has an extra support mount - resulting in a much more reliable install.
- No throttle - this system is a pure pedelec; motivating you to pedal harder and go farther.
- 80Nm of torque is almost twice as much as a hub motor and can help you climb up any hill in your way.
TSD2 Mid-drive System assembly process
1. Motor installation
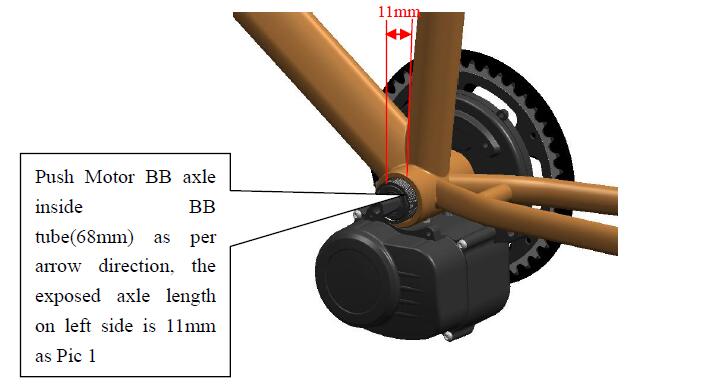
Step 1: the motor shaft sleeve in the direction of the arrow push bike five-tube length of 68mm five-pass pipe, the length of the sleeve is exposed to 11mm, as shown in Pic1.
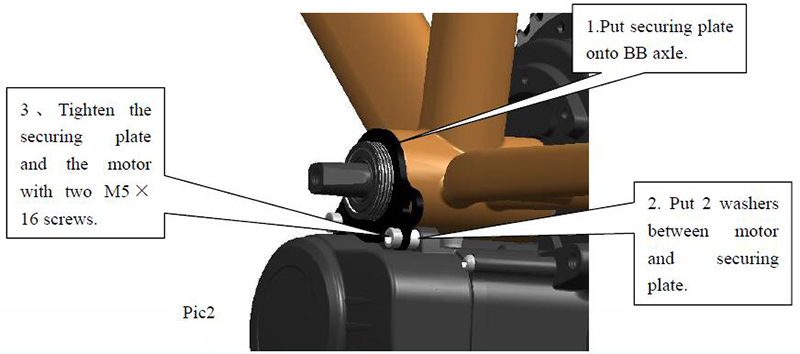
Step 2: Install the reinforcing plate. See the Pic2.
1. the reinforcing plate set in the five-axis
2. two aluminum washers placed between the reinforcing plate and motor home
3. with two socket head cap screws M5 × 16 will strengthen the locking plate and motor home
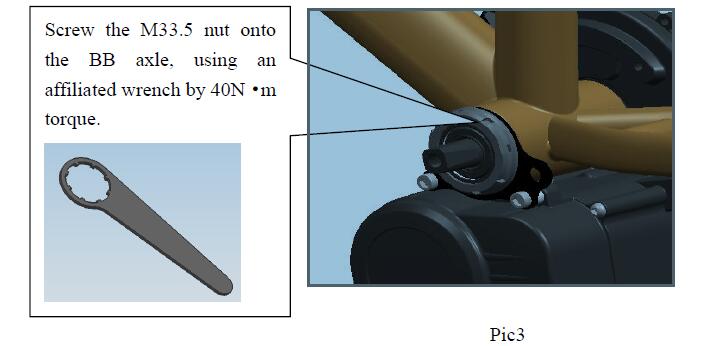
Step 3: M33.5 nut screwed onto the sleeve axis, with a special tool to tighten the locking force of 40N · m.See the Pic3.
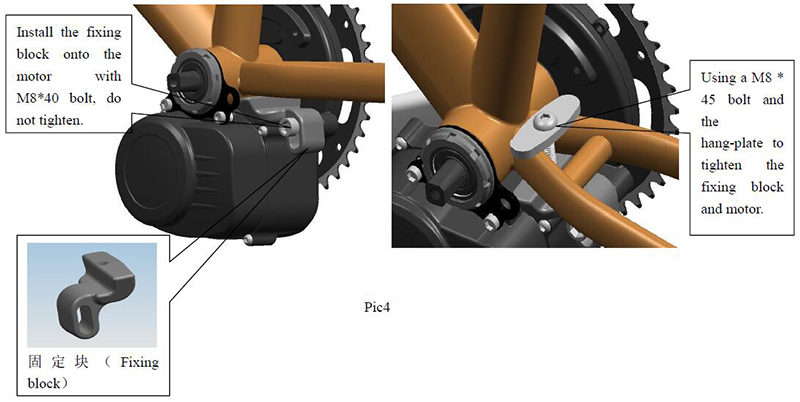
Step 4: fixing the motor and the frame. See the Pic4.
1. M8 * 40 screw connections fixed block and motorhome body stud hole preload.
2. with the ball screw M8 * 45 screw holes through the fixing plate fixed on the block with the fixed locking.
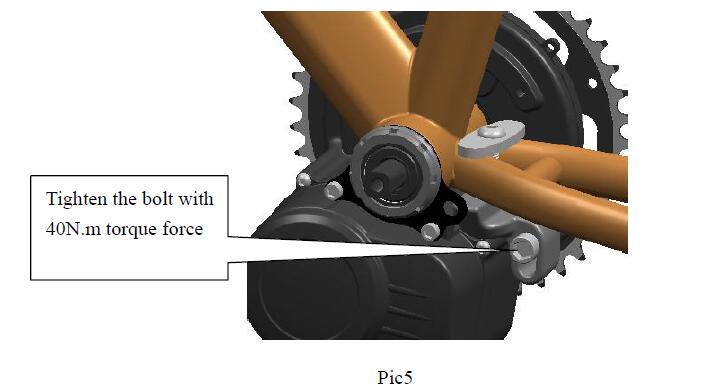
Step 5: 40N · m of force tighten M8 * 40 screws (final lock). See the Pic5
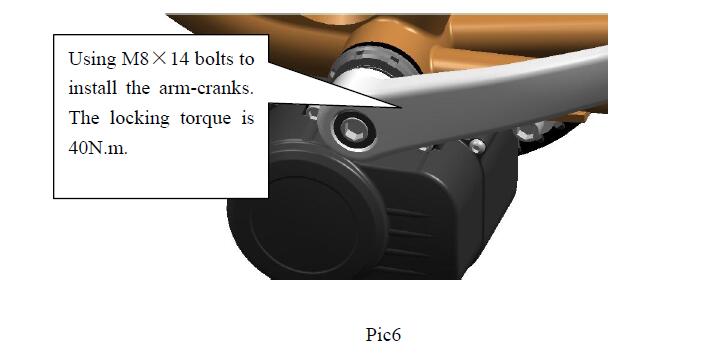
Step 6: Install cranks. See the Pic6.
Install left and right crank with M8 × 14 hexagon screw locking torque is 40N · m.
2. Meter Installation
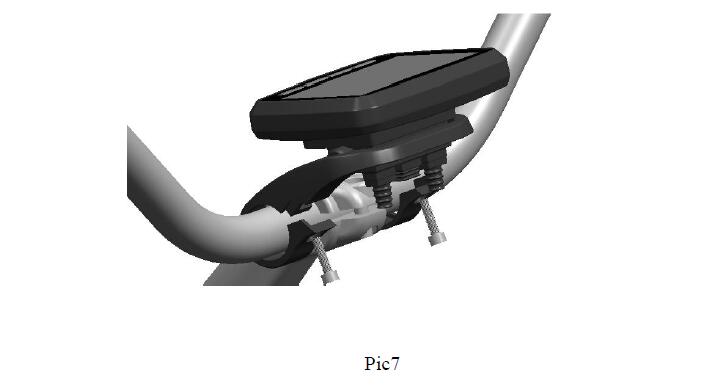
Step 1: Install the instrument. See the Pic7.
With two M4 × 14 hexagon socket head screws and two M4 nuts square meters is fixed at a position shown in the Pic7.
Bracket Specifications: φ32, there are adjustment ring.
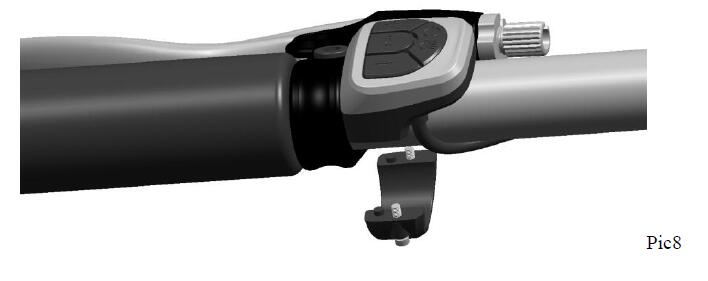
The second step, the left-hand operation switches installed. See the Pic8.
With two M2.5 × 10 hexagon socket head cap screws at the position illustrated operation switch fixed
Inventory Last Updated: Oct 22, 2025


